The Kinetic Go devices equipped with printers will always generate a Merchant Copy of the receipt and they give the merchant the option to print a Cardholder Receipt too.
Regardless of whether or not the device has a printer, the data used to print the receipt is generated and attached to the transaction record for you to use in your application too.
In the transaction record there are two fields that contain the data, merchant_receipt and customer_receipt. When you receive this information via the Connect API, it will be URL encoded to protect any special characters when transporting the data via JSON.
The first step to access the receipt data is to URL decode this. Once decoded, the result (using the Merchant Copy in “Hello World!” as an example) will look like this:
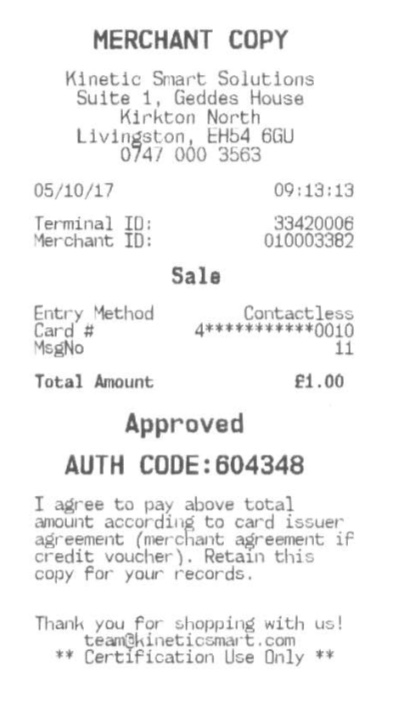
[{"scroll":50},{"align":"center","size":30,"style":"bold","text":"MERCHANT+COPY"},{"text":"+"},{"align":"center","size":22,"text":"Kinetic+Smart+Solutions"},{"align":"center","size":22,"text":"Suite+1,+Geddes+House"},{"align":"center","size":22,"text":"Kirkton+North"},{"align":"center","size":22,"text":"Livingston,+EH54+6GU"},{"align":"center","size":22,"text":"0747+000+3563"},{"text":"+"},{"text":["05/10/17","09:13:13"]},{"text":"+"},{"text":["Terminal+ID:","33420006"]},{"text":["Merchant+ID:","010003382"]},{"scroll":20},{"align":"center","size":25,"style":"bold","text":"+Sale"},{"text":"+"},{"text":{"size":21,"1":"Entry+Method","2":"Contactless"}},{"text":["Card+#","4***********0010"]},{"text":["MsgNo",11]},{"text":"+"},{"style":"bold","text":["Total+Amount","£1.00"]},{"text":"+"},{"align":"center","size":30,"style":"bold","text":"Approved"},{"text":"+"},{"align":"center","size":30,"style":"bold","text":"AUTH+CODE:604348"},{"text":"+"},{"align":"center","text":"I+agree+to+pay+above+total\namount+according+to+card+issuer\nagreement+(merchant+agreement+if\ncredit+voucher).+Retain+this\ncopy+for+your+records.\n"},{"text":"+"},{"text":"+"},{"align":"center","size":20,"text":"Thank+you+for+shopping+with+us!"},{"align":"center","size":20,"text":"team@kineticsmart.com"},{"align":"center","size":20,"text":"**+Certification+Use+Only+**"},{"scroll":175}]
In this is an ordered list of content and styling attributes that can be applied to any format. Do keep in mind that thermal printers operate line by line, so you can interpret any measurements, such as size and scroll, as number of printed pixel lines in height.
Each of the JSON object text properties will also have to be individually URL decoded too in order to extract the correct information.
The data above will produce the following receipt on the printer:
Each line normally contains text and styling and you can use one or more descriptors to specify how that text should be printed. The directives you can expect to see in each of the ordered JSON objects that make up the receipt are:
{"scroll":50} : scroll for 50 pixels. Scroll is typically used to feed paper at the start and end of a receipt, as well as create space for items such as areas to sign the receipt.
{"text":"Hello world","align":"left"}
“text”:”Hello world”
Almost all printing will involve text, so you can expect a text=”something to print” in most receipt items. You will have to individually URL decode these text fields too in order to extract the correctly formatted information to use.
“align”:”left/center/right”
The text being printed can be horizontally aligned to the left, center (middle) or right of the paper. Default is left aligned.
{"text":"This is bold","style":"bold"}
“style”:”regular/italic/bold/extra_bold/bold_italic”
The style directive is to specify the weight of the text on the receipt, ranging from regular to extra_bold. Default is regular.
{"text":"This is regular 10","size":10}
“size”:10
The size denotes the height of the printed text in number of pixels. Default is 20.
{"text":["05/10/17","09:13:13"],"style":"bold","size":22}
“text”:[“05/10/17″,”09:13:13”]
In order to print left and right aligned text at the same time, you can specify two strings together in a text directive. The first string listed will be printed on the left side of the receipt.